
Wood Fired Coil Kit Installation Tutorial
Share
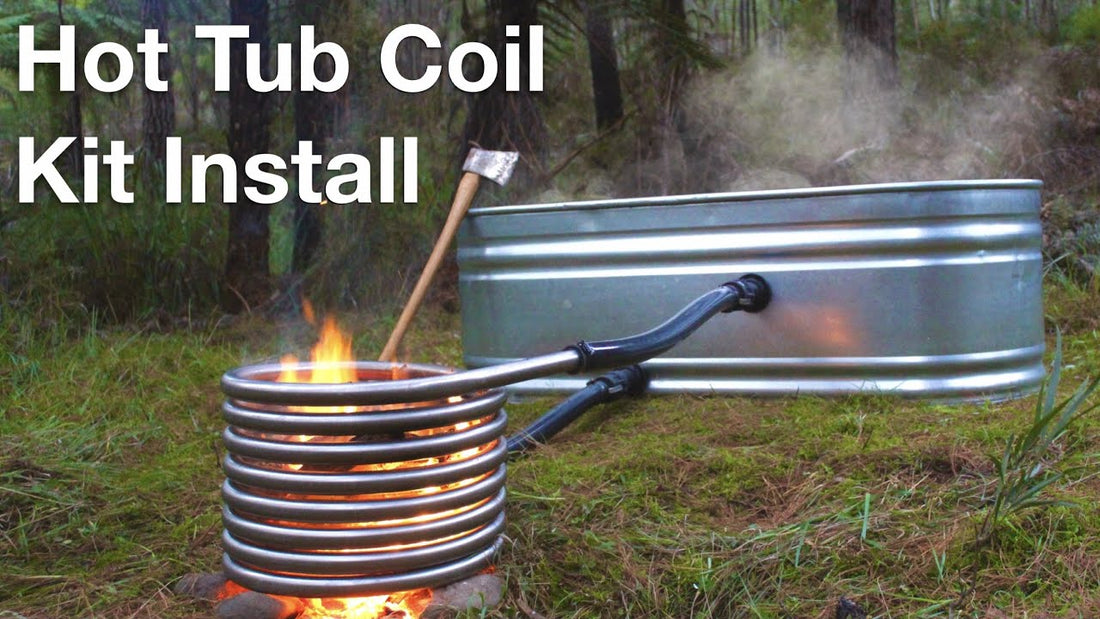
Welcome to the stainless steel coil kit installation tutorial by Salty Barrel. In this video, we'll guide you through the process of installing the coil kit.
Gather Your Materials: For this project, you will need the following materials:
- The coil kit
- An electric drill
- A tub (Today, we're using a stock tank, but the coil kit can be attached to any tub with walls under 8cm thick.)
Unboxing:
- Begin by unboxing the coil kit. Here's what you'll find inside:
- The fittings bag, fire-resistant hoses, gasket matting, the thermometer, and the stainless steel heating coil.
Assembly:
- Use a 64mm - 70mm hole saw drill bit to drill two holes in the side of your tub.
- Ensure the holes are in line with the coil inlet and outlet.
- Push the universal through wall ports through the holes, replacing the gasket on the other end.
- Screw them tightly to avoid leaks, and then screw the male quick connect fitting onto the end of the ports.
- Take the female quick connect fittings and push them into the fire-resistant hoses.
- Secure them in place with the included stainless steel hose clamp.
- The hoses should now be securely connected to the fittings, resembling this configuration.
- Place a hose clamp over the end of the coil and slide the hose onto the coil, ensuring it goes only as far as the black end cap section.
- Position the hose clamp over the hose and tighten it securely.
- To connect the coil to the tub, simply push the quick connect fittings together and lock them in place.
- Congratulations! The installation of your coil kit is now complete.
Thermosyphon:
- The heat from the fire causes the water in the coil to rise naturally, creating a thermosyphon effect.
- This circulation process is ideal for off-grid applications, as it operates without the need for a pump.
- With just water and a fire, this system works efficiently, with no moving parts.
Cooking:
- The coil is designed to accommodate a large wok or BBQ grill plate, allowing you to cook over the flames while the tub heats up.
- It adds versatility to your wood-fired hot tub experience, combining relaxation and culinary delights.
Results:
- In this example, the 6-foot stock tank holds 700L of water.
- It took approximately 2 hours and 10 minutes to heat up to 40°C (104°F).
- Now, it's time to immerse yourself and enjoy the soothing warmth of your wood-fired hot tub.
Conclusion: Thank you for watching the wood-fired coil kit installation tutorial. With the power of heat harnessed by your Salty Barrel, you can indulge in the ultimate relaxation experience. Now, sit back, unwind, and enjoy the soothing bliss of your wood-fired hot tub.